Recently I had to make a bootable SD card for a Raspberry Pi Zero and I faced some issues. I thought to write some hints on how to properly clone and shrink a Pi image on an SD card. Here’s how you can create a compressed ISO (or disk image) from your Raspberry Pi SD card safely and efficiently — step-by-step. And shrink it. Very important !
DANGER !!! Do a copy of your card to avoid losing data !!!
Because I have a mac and macs are not always very friendly when it comes to standard Linux commands, I choose a Raspberry Pi 4B with a 64GB card to do all the steps below.
After inserting the SD card in a USB port (using an SD-to-USB adapter), I ran sudo fdisk -l:
Disk /dev/sda: 29.72 GiB, 31914983424 bytes, 62333952 sectors
Disk model: USB SD Reader
Units: sectors of 1 * 512 = 512 bytes
Sector size (logical/physical): 512 bytes / 512 bytes
I/O size (minimum/optimal): 512 bytes / 512 bytes
Disklabel type: dos
Disk identifier: 0x10f151f2
.
Device Boot Start End Sectors Size Id Type
/dev/sda1 16384 1064959 1048576 512M c W95 FAT32 (LBA)
/dev/sda2 1064960 62333951 61268992 29.2G 83 Linux
Creation of a raw image copy is done with dd command:
sudo dd if=/dev/sda of=raspbian.img bs=4M status=progress
sync
You can use any filename instead of raspbian.img:

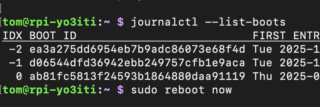
Cloning a 32 GB SD card in RPi terminal. See the dd copy command and the status=progress that allows verbose clone of the card. This was done for a ham friend of mine, YO8TNC, thus the name of the file.
After the copy is done, you can compress it with
gzip (fast, standard)
gzip raspbian.img
Result: raspbian.img.gz
xz (slower, smaller)
xz -T0 -9 raspbian.img
Result: raspbian.img.xz
zstd (very fast and efficient)
zstd -19 raspbian.img
Result: raspbian.img.zst
However, by default, dd copies the entire 32 GB card, including empty space. I wanted to shrink it so the image only contains the used partitions (the actual data), saving time and space. PiShrink automatically resizes the filesystem inside a Raspbian image to the minimum possible size. Sequence of commands:
sudo apt update
sudo apt install git dosfstools e2fsprogs parted
git clone https://github.com/Drewsif/PiShrink.git
cd PiShrink
sudo cp pishrink.sh /usr/local/bin/pishrink
sudo chmod +x /usr/local/bin/pishrink
Then shrink the image:
sudo pishrink raspbian.img raspbian-shrunk.img
And compress:
xz -T0 -9 raspbian-shrunk.img
Result: raspbian-shrunk.img.xz (usually 2–4 GB instead of 32 GB)
I hope this was helpful Good luck.
73