AMD Xilinx PetaLinux is not a normal Linux distribution like Ubuntu or Debian. It is a set of tools used to build a custom embedded Linux distribution targeting Xilinx/AMD FPGA SoCs, such as the Zynq-7000 SoC used on the Digilent Arty Z7. Think of it as a build system and configuration environment, not the OS itself.
PetaLinux is an embedded Linux Software Development Kit (SDK) specifically targeting FPGA-based system-on-a-chip (SoC) designs. Under the hood it is a curated wrapper around the Yocto Project and OpenEmbedded build framework, pre-configured and tuned for Xilinx/AMD hardware. Rather than learning the full complexity of Yocto from scratch, PetaLinux gives you a set of high-level commands (petalinux-create, petalinux-config, petalinux-build, petalinux-package) that drive the underlying Yocto machinery.
Why do you need a dedicated build system for FPGA SoCs?
On a conventional ARM board like a Raspberry Pi, the hardware is fixed. The kernel just needs to match a known board configuration. With an FPGA SoC like the Zynq-7000, part of the hardware itself is programmable. The FPGA fabric (called the PL — Programmable Logic) can contain custom peripherals: a custom UART, a DMA engine, a signal processing block — anything you design in Vivado.
Linux needs to know about all these peripherals to load the right drivers. This knowledge lives in the device tree, a data structure that describes the hardware to the kernel at boot time. Every time you change your FPGA design and add or remove a peripheral, the device tree must be regenerated. PetaLinux automates this: it reads the Hardware Description File (.xsa) exported from Vivado and generates a correct, matching device tree automatically.
This tight coupling between software and programmable hardware is the core reason PetaLinux exists.
The Zynq-7000 architecture in brief
The Zynq-7000 is a heterogeneous SoC that integrates two distinct domains on a single chip:
- PS (Processing System): A dual-core ARM Cortex-A9 running at up to 866 MHz, with DDR memory, USB, Ethernet, SD/MMC, SPI, I2C, UART, and other hard peripherals. This is where Linux runs.
- PL (Programmable Logic): An Artix-7 FPGA fabric that you configure using a bitstream generated by Vivado. This is where custom hardware accelerators, interfaces, and peripherals live.
The PS and PL are tightly connected through high-speed AXI buses (AXI HP, AXI GP, AXI ACP), allowing the ARM cores to access custom PL peripherals as if they were memory-mapped registers, and allowing PL logic to access DDR memory directly through DMA. This makes it possible to offload real-time or compute-intensive work to the FPGA while the ARM cores handle the operating system, filesystems, networking, and user-space applications.
On the Arty Z7 board specifically, the Zynq runs at 667 MHz, has 512 MB of DDR3L RAM, and exposes the PL through Pmod connectors and HDMI ports — a great platform for prototyping embedded Linux systems with custom hardware.
What PetaLinux actually builds
When you run a PetaLinux build, it compiles and assembles several distinct components from source. Each one is essential for the system to boot and run:
- FSBL (First Stage Boot Loader): The very first code that executes after power-on. It initialises the PS (clocks, DDR, MIO pins), loads the FPGA bitstream into the PL, and then hands control to U-Boot. The FSBL is specific to your hardware configuration and is generated from the
.xsafile. - FPGA bitstream (
.bit): The binary configuration file for the PL, produced by Vivado. It defines what logic is present in the FPGA fabric. The FSBL loads this at boot so that PL peripherals are available by the time Linux starts. - U-Boot (Second Stage Bootloader): A full-featured open-source bootloader. U-Boot initialises remaining hardware, presents an optional interactive prompt, and loads the Linux kernel and device tree from storage (SD card, QSPI flash, TFTP, etc.). It also handles the boot arguments passed to the kernel.
- Linux kernel: Cross-compiled for ARM Cortex-A9 (armv7-a). PetaLinux uses a Xilinx-maintained fork of the mainline kernel that includes patches for Zynq-specific drivers (PS peripherals, PL-PS bridge, XDMA, etc.).
- Device tree blob (
.dtb): Compiled from the device tree source (.dts) auto-generated from your.xsa. It describes to the kernel the exact hardware present: memory map, interrupt numbers, clock frequencies, and all peripherals — both PS hard IP and custom PL IP cores. - Root filesystem: The userspace environment — init system, shell, libraries, and applications. By default this is a minimal BusyBox-based system, but you can layer additional packages using Yocto recipes (e.g., Python, OpenSSL, dropbear SSH, custom applications).
The output files
After a successful build, PetaLinux produces these primary files in images/linux/:
BOOT.BIN— A composite binary (also called a boot image) that packages the FSBL, the FPGA bitstream, and U-Boot together. This is the first file the Zynq BootROM looks for on the SD card or QSPI flash.image.ub(orboot.scr+Image+system.dtb) — A U-Boot FIT image that combines the Linux kernel and device tree blob. U-Boot loads and unpacks this to start Linux.rootfs.tar.gz/rootfs.ext4— The root filesystem, either as a tarball (for RAM-based rootfs) or a disk image (for SD card EXT4 partition).system.dtb— The standalone compiled device tree, useful for debugging.vmlinux— The uncompressed kernel ELF, useful for kernel debugging with GDB or Lauterbach.
On an SD card you typically place BOOT.BIN and image.ub on the FAT32 first partition, and extract the root filesystem onto the EXT4 second partition. The Zynq BootROM reads BOOT.BIN, which then chains through FSBL → bitstream load → U-Boot → kernel.
The full boot sequence looks like this:
Power on
  ↓
Zynq BootROM (in ROM, reads BOOT.BIN from SD/QSPI)
  ↓
FSBL
  – initialises PS clocks and DDR
  – loads PL bitstream
  – loads U-Boot
  ↓
U-Boot
  – initialises remaining peripherals
  – loads kernel + device tree (image.ub)
  ↓
Linux kernel
  – mounts root filesystem
  – starts init / BusyBox
  ↓
Userspace shell / applications
The relationship with Yocto
Yocto is a powerful but complex open-source project that provides tools and methodology for building custom embedded Linux distributions from scratch. Every package, library, and kernel is described as a recipe (.bb file). Recipes are grouped into layers. A build is configured through a set of configuration files (local.conf, bblayers.conf) and then driven by the bitbake build engine.
PetaLinux adds the Xilinx-specific layers on top of Yocto and hides most of the Yocto configuration behind its own command-line interface. When you run petalinux-config, you are actually editing Yocto configuration. When you run petalinux-build, it calls bitbake internally. The advantage is that you do not need to understand all of Yocto to get started. The disadvantage is that when things go wrong deep in the build, you may eventually need to understand Yocto to debug it.
If you need to add a custom application or library, you write a Yocto recipe and place it in a custom layer under project-spec/meta-user/. PetaLinux automatically includes this layer in the build.
Typical workflow
A complete PetaLinux project workflow from start to a running board looks like this:
- Design your hardware in Vivado. Add IP cores to the block design (AXI GPIO, AXI UART, custom IP, etc.), run synthesis and implementation, then export the hardware: File → Export → Export Hardware. Make sure to include the bitstream. This produces a
.xsafile. - Create a PetaLinux project. On your Linux host (Ubuntu 22.04 or 20.04 recommended):
petalinux-create –type project –template zynq –name my_project
- Import the hardware description.
cd my_project
petalinux-config –get-hw-description /path/to/your.xsa
This reads the
.xsa, configures U-Boot and the kernel for your specific PS settings (DDR size, clock frequencies, enabled PS peripherals), and generates the base device tree. You can also set boot options here (SD card, QSPI, JTAG). - Configure the kernel (optional).
petalinux-config -c kernel
This opens the standard Linux
menuconfiginterface, letting you enable or disable kernel subsystems and drivers. - Configure the root filesystem (optional).
petalinux-config -c rootfs
Here you can add packages: Python, OpenSSH, i2c-tools, custom applications, etc.
- Build the project.
petalinux-build
This runs
bitbaketo compile the FSBL, U-Boot, kernel, device tree, and root filesystem. On first build this downloads and compiles everything from source, which can take 1–2 hours depending on your machine. Subsequent builds are much faster due to caching. - Package the boot image.
petalinux-package –boot –fsbl images/linux/zynq_fsbl.elf \
  –fpga images/linux/system.bit \
  –u-boot –force
This creates
BOOT.BIN. - Write to SD card. Format the card with two partitions: FAT32 (~256 MB) and EXT4 (remaining space). Copy
BOOT.BINandimage.ubto the FAT32 partition. Extractrootfs.tar.gzto the EXT4 partition as root:sudo tar xf images/linux/rootfs.tar.gz -C /mnt/ext4/
- Boot the board. Set the Arty Z7 jumper to SD boot mode, insert the card, connect a USB-UART cable, open a terminal at 115200 baud, and power on. You should see the FSBL output, then U-Boot, then the Linux boot log, and finally a login prompt.
Device tree: the glue between hardware and software
The device tree deserves special attention because it is the part most likely to cause confusion when you are first starting out. The kernel has no way to probe for hardware in an embedded system the way a PC can probe PCI buses. Instead, at boot time U-Boot passes the kernel a pointer to the compiled device tree blob (.dtb). The kernel reads this structure and instantiates drivers accordingly.
PetaLinux auto-generates the device tree from the .xsa. For example, if you added an AXI GPIO block in Vivado connected to a set of LEDs, the generated device tree will contain an entry like:
axi_gpio_0: gpio@41200000 {
    compatible = “xlnx,xps-gpio-1.00.a”;
    reg = <0x41200000 0x10000>;
    #gpio-cells = <2>;
    xlnx,gpio-width = <0x4>;
};
The compatible string tells the kernel which driver to use. The reg property gives the base address and size of the peripheral’s register space in the AXI address map. The kernel GPIO subsystem will then expose those LEDs through /sys/class/gpio/ or via the libgpiod userspace library.
You can extend the auto-generated device tree by editing the overlay files in project-spec/meta-user/recipes-bsp/device-tree/files/system-user.dtsi. This is where you add interrupt mappings, pin mux settings, or properties that Vivado’s export does not know about.
Adding your own application
Suppose you want to include a custom C application in the root filesystem. You create a Yocto recipe for it:
project-spec/meta-user/recipes-apps/myapp/
    myapp.bb          <– the recipe
    files/
        myapp.c       <– your source code
A minimal recipe (myapp.bb) looks like:
SUMMARY = “My custom application”
LICENSE = “MIT”
LIC_FILES_CHKSUM = “file://${COMMON_LICENSE_DIR}/MIT;md5=…”

SRC_URI = “file://myapp.c”

S = “${WORKDIR}”

do_compile() {
    ${CC} ${CFLAGS} ${LDFLAGS} -o myapp myapp.c
}

do_install() {
    install -d ${D}${bindir}
    install -m 0755 myapp ${D}${bindir}
}
Then enable it in petalinux-config -c rootfs under user packages, rebuild, and your binary will be at /usr/bin/myapp on the target.
Host system requirements
PetaLinux only runs on Linux. The officially supported host distributions change with each release; for PetaLinux 2025.2, check the release notes, but Ubuntu 22.04 LTS is generally the safest choice. Running it inside a VM or Docker container is common and works well, though you need to be careful with disk space: a single PetaLinux project with its downloaded sources and build artefacts can easily consume 50–100 GB.
You will also need a number of host packages before PetaLinux will install successfully. The installer will check for these and warn you. Typical requirements include:
sudo apt install -y gawk wget git diffstat unzip texinfo gcc build-essential \
  chrpath socat cpio python3 python3-pip xterm rsync curl zlib1g-dev \
  libssl-dev libglib2.0-dev libsdl1.2-dev xvfb libtool lzop
PetaLinux itself is installed by running the downloaded installer as a non-root user into a directory of your choice (e.g., ~/petalinux/2025.2). You source the settings script before each session:
source ~/petalinux/2025.2/settings.sh
Downloading PetaLinux 2025.2
- Go to the AMD Embedded Design Tools download page.
- Download PetaLinux Tools — Installer — 2025.2 Full Product Installation. You will need a free AMD account to download.
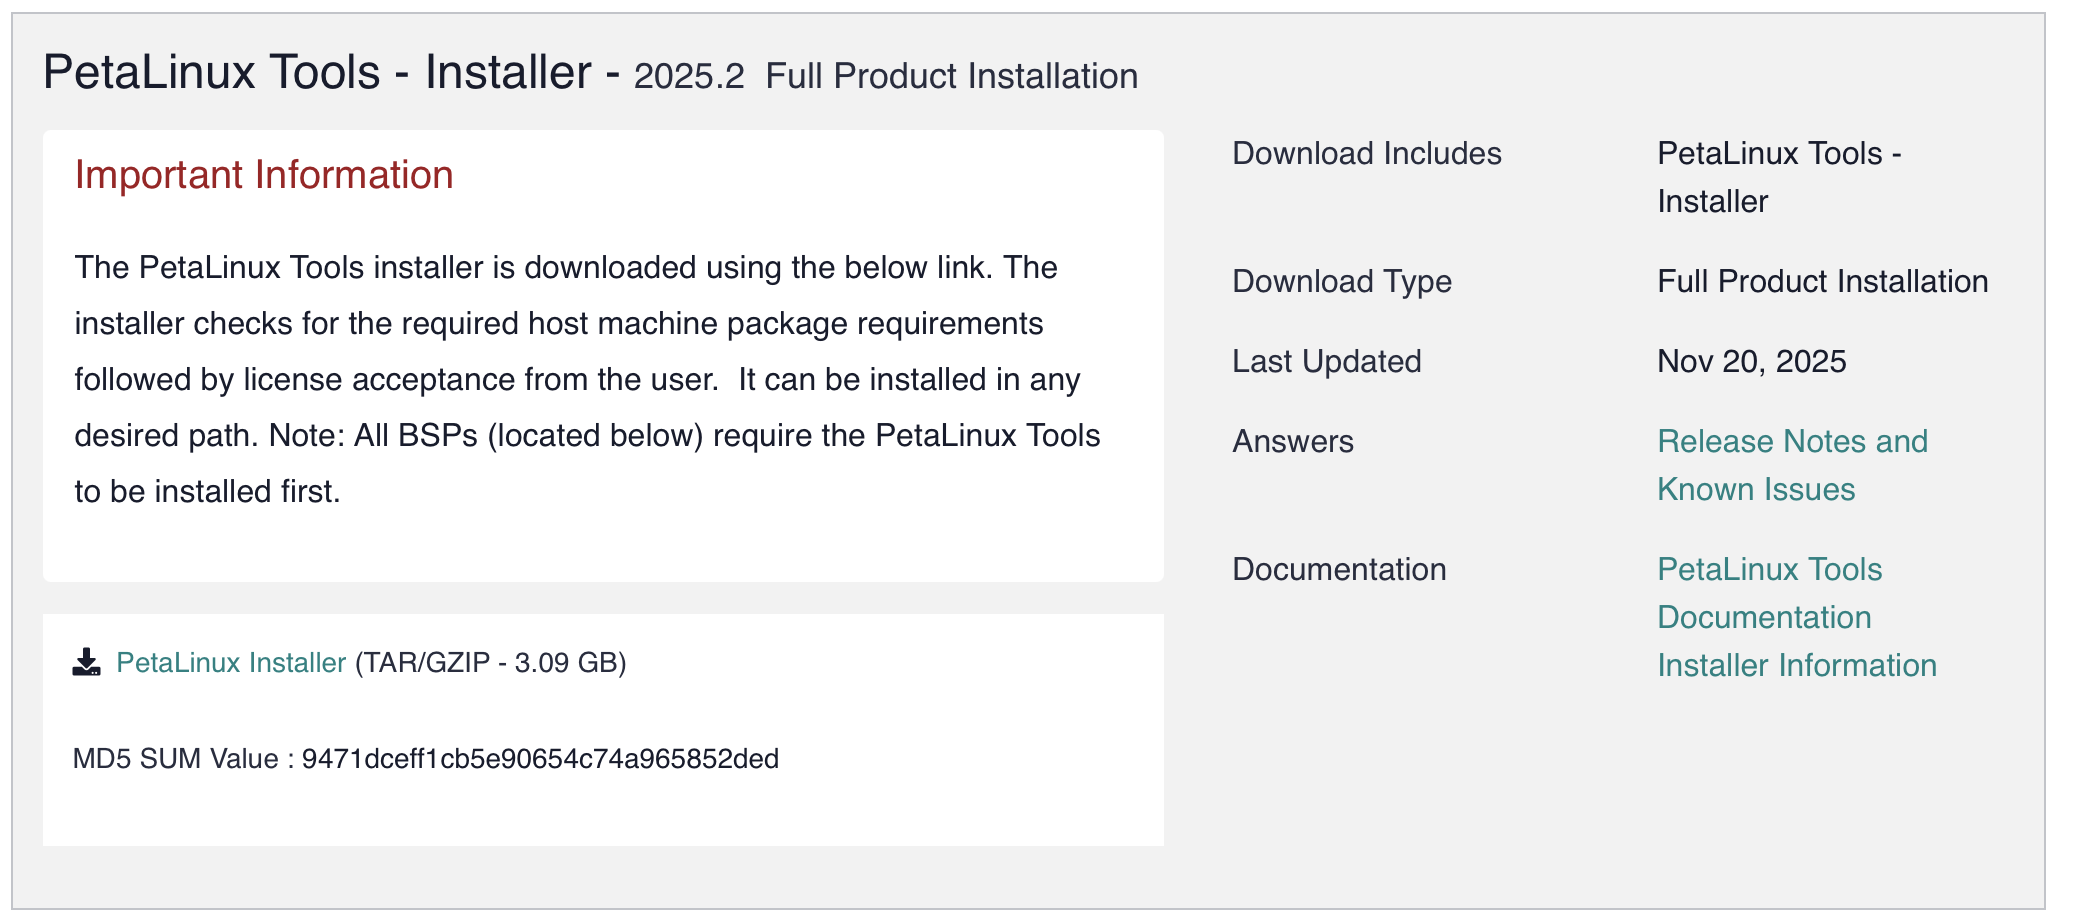
- Read the release notes carefully — they list supported OS versions, known issues, and any changes to the toolflow since the previous release.
- Read the PetaLinux Tools Reference Guide (UG1144). This is the primary official documentation. It covers installation, project creation, configuration, build, packaging, and QEMU emulation.
Common pitfalls
- Mismatched versions. Always use the same version of PetaLinux, Vivado, and Vitis. Mixing 2024.2 PetaLinux with a 2025.2 Vivado
.xsawill cause subtle and hard-to-debug failures. - Disk space. Run
df -hbefore starting a build. 100 GB of free space is a safe minimum for a project directory. - Slow builds on HDDs. The Yocto build system performs enormous numbers of small file operations. An SSD makes a significant difference; an HDD can make builds feel glacial.
- Network access during build. The first build fetches source tarballs from the internet. If you are behind a corporate proxy, you need to configure
http_proxy/https_proxyenvironment variables before runningpetalinux-build. - Running as root. Do not install or run PetaLinux as root. It is designed for a regular user and will refuse or misbehave if you try.
- Shell compatibility. PetaLinux requires
bashas/bin/sh. On Ubuntu this is the default, but on Debian you may need to runsudo dpkg-reconfigure dashand select No to switch from dash to bash.
Useful commands at a glance
petalinux-create --type project --template zynq --name <name> |
Create a new project for Zynq-7000 |
petalinux-config --get-hw-description <path> |
Import hardware description (.xsa) |
petalinux-config |
Open top-level project configuration (menuconfig) |
petalinux-config -c kernel |
Configure the Linux kernel |
petalinux-config -c rootfs |
Configure the root filesystem packages |
petalinux-config -c u-boot |
Configure U-Boot |
petalinux-build |
Build everything |
petalinux-build -c <component> |
Build a single component (e.g., kernel, u-boot, device-tree) |
petalinux-package --boot --fsbl ... --fpga ... --u-boot |
Create BOOT.BIN |
petalinux-package --image --format jffs2 |
Package rootfs for QSPI flash |
petalinux-boot --jtag --kernel |
Boot kernel over JTAG (requires hardware + cable) |
petalinux-boot --qemu --kernel |
Boot kernel in QEMU emulator (no hardware needed) |
Further reading
- UG1144 — PetaLinux Tools Reference Guide
- UG585 — Zynq-7000 SoC Technical Reference Manual
- Yocto Project documentation — for when you need to go deeper than PetaLinux abstracts
- Digilent Arty Z7 reference